
Transform Your Messy Garage Into a Space You Actually Want to Use
When you can barely squeeze your car past boxes and bikes, a garage makeover transforms the space into an organized, functional zone. The process involves clearing clutter, then installing custom cabinetry, slatwall panels, and durable flooring to match your storage needs. This overhaul reclaims your garage for parking, a workshop, or a home gym—all while boosting property value.
Planning Your Garage Transformation: First Steps to Take
Begin by completely emptying your garage, assessing every item to decide what stays, what is donated, and what is tossed. Next, measure every wall, floor, and ceiling dimension, then map out zones for parking, storage, and a workspace. Don’t overlook the vertical space above your head for overhead racks that turn air into prime real estate. Finally, inspect the floor for cracks and the walls for moisture before laying down durable epoxy or interlocking tiles.
Assessing Your Current Space: What to Measure and Consider

Begin by recording the garage’s precise length, width, and ceiling height, noting any irregularities like sloped floors or exposed beams. Measure all obstructions—water heaters, ductwork, support columns—and document their exact positions relative to walls. Assess wall material (drywall, block, or stud-framed) to determine mounting capacity. Evaluate existing electrical outlets, lighting placement, and door operation clearance. This data enables accurate spatial planning for garage systems, preventing conflicts between storage zones and vehicle access while identifying structural limits for shelving or lifts from the outset.
Setting a Realistic Budget for Your Renovation Project
Begin by listing every desired change, then obtain at least three itemized quotes for labor and materials. A realistic budget hinges on a 20% contingency fund for unexpected structural or electrical issues common in garage conversions. Allocate funds strictly within categories: flooring, insulation, storage systems, and lighting. Skimping on waterproofing now will cost double to remedy later. Compare the cost-per-square-foot of finished garage space against traditional living area additions to sharpen your spending.
| Budget Category | Realistic Allocation |
|---|---|
| Structural & Safety | 25-35% (floor, walls, electrical) |
| Finishes & Storage | 30-40% (cabinets, shelving, flooring) |
| Contingency | 20% minimum |
| Permits & Pro Install | 5-10% |
Deciding Between DIY and Hiring a Professional Installer
Deciding between DIY and hiring a professional installer hinges on your skill level, available tools, and project complexity. For tasks like slatwall installation or simple shelving, a confident DIYer with basic power tools can save 30–50% on labor costs. However, consider hiring a professional installer for epoxy flooring, electrical work, or custom cabinetry, where mistakes void material warranties. Evaluate time: a DIY epoxy coat demands days of prep and curing, while a pro finishes in under 24 hours. If a misstep could damage structure or force a redo, professional cost often outweighs rework expenses.
| Aspect | DIY | Professional Installer |
|---|---|---|
| Skill Required | Intermediate to advanced | Certified or experienced |
| Time Investment | High (often multiple weekends) | Low (1–2 days for most jobs) |
| Cost | Typically 30–50% lower | Higher but includes warranty |
| Risk of Error | Moderate to high | Low |
Flooring Options That Withstand Heavy Use
For a garage makeover, epoxy and polyaspartic coatings are the best flooring options to withstand heavy use from vehicle traffic, dropped tools, and chemical spills. These systems bond directly to concrete, creating a non-porous, high-gloss surface that resists hot tire marks, staining, and peeling far better than basic paint. A proper two-coat polyaspartic install cures within hours, allowing you to park or work again the same day.
Unlike standard epoxy, polyaspartic offers superior UV stability, preventing yellowing in sunlit garages while maintaining impact resistance.
For extreme loads like a workbench or hydraulic jack, ensure the concrete substrate is sound, as the coating itself does not add structural strength but provides a seamless, cleanable armor.
Comparing Epoxy, Polyaspartic, and Interlocking Tiles

When comparing epoxy, polyaspartic, and interlocking tiles for a heavy-use garage makeover, the key difference lies in installation and durability. Epoxy offers a rock-hard, affordable finish but requires meticulous surface prep and days of curing. Polyaspartic provides a faster, UV-stable alternative that cures in hours, making it ideal for quick turnarounds. Interlocking tiles are the easiest DIY option, snapping together without glue or curing, and they allow simple replacement of damaged sections. All handle vehicle weight, but polyaspartic resists hot-tire peel best, while tiles offer the most forgiving surface for dropped tools. Polyaspartic coatings offer the best balance of speed and strength for most homeowners. Q: Which option is easiest for a weekend project? A: Interlocking tiles win for sheer simplicity—just lay them down with no drying time required.
How to Choose a Slip-Resistant and Stain-Proof Surface
To choose a slip-resistant and stain-proof surface for a heavy-use garage, prioritize traction by selecting epoxy coatings with added aggregate or textured polyaspartic floors that maintain grip when wet. For stain resistance, seek chemical-cured, non-porous finishes like polyurethane or high-solid epoxy, which repel oil, antifreeze, and tire marks. Test the surface’s texture by running a water test on a sample—beads indicate effective sealing—and verify the coating’s scratch hardness rating to ensure it withstands dropped tools without chipping. This direct approach balances safety and longevity under daily garage abuse.
Understanding Curing Times and Durability for Daily Traffic
Understanding curing times is non-negotiable for a garage floor that withstands daily traffic. Most high-durability coatings, like polyaspartic or 100% solids epoxy, require a full chemical cure—often 24 to 72 hours—before you can park a vehicle or walk heavily. Rushing this process leads to soft spots, peeling, or tire pickup that ruins the finish. For the best durability under daily use, consider that polyurea-based systems cure in hours, not days, allowing you to drive on them the same evening, while traditional epoxy may need a week of gentle handling. Always check the manufacturer’s exact cure timeline; a fully hardened surface resists hot tires, dropped tools, and scuffs far longer than one rushed into service.
| Coating Type | Cure Time for Daily Traffic | Durability Factor |
|---|---|---|
| Polyaspartic | 2–4 hours | Excellent against heat & UV |
| 100% Solids Epoxy | 24–72 hours | Very high impact resistance |
| Water-Based Epoxy | 5–7 days | Moderate; best for light use |
Maximizing Storage Without Cluttering the Walls
In a garage makeover, maximizing storage without cluttering the walls means leveraging the vertical plane through sleek, floor-to-ceiling cabinetry and hidden shelving, rather than exposed hooks. Install tall, lockable cabinets to stow tools and sports gear behind clean panels, preserving an open feel. Add a ceiling-mounted overhead rack for bulky seasonal items, keeping the floor clear and walls unbroken. A sliding pegboard tucked behind a cabinet door offers flexible tool organization without visual noise. Focus on modular, flush-fit solutions that integrate into your existing layout, ensuring every bin and shelf serves a distinct purpose without overwhelming the space.
Installing Ceiling-Mounted Racks for Bikes and Bins
Installing ceiling-mounted racks for bikes and bins reclaims vertical space without touching wall surfaces. First, locate ceiling joists using a stud finder. Second, mount heavy-duty steel racks directly into joists with lag bolts, ensuring a weight rating exceeding your load. Third, lift the bike or bin onto the rack’s arms or platform. For bins, choose a drop-down rack with a pulley system to lower heavy loads safely. Position racks above non-walking areas to avoid headroom issues. Always verify clearance for garage door operation.
- Measure ceiling height and confirm door clearance.
- Attach brackets to joists with grade-8 hardware.
- Secure load evenly to prevent imbalance.

Using Modular Cabinet Systems for Tools and Gear
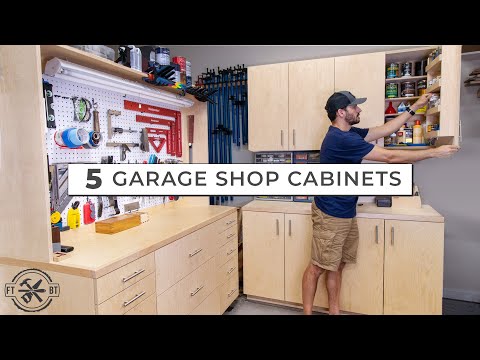
Modular cabinet systems for tools and gear transform a chaotic garage into an organized workshop by concealing clutter behind closed doors while keeping everything accessible. These systems allow you to configure custom combinations of deep drawers for power tools, adjustable shelves for bulky equipment, and pegboard inserts for frequently used hand tools. Customizable modular cabinet systems prevent wall congestion by shifting storage into vertical, enclosed units that do not encroach on floor space.
- Heavy-duty lockable cabinets secure expensive gear and keep hazardous chemicals out of reach.
- Sliding or pull-out trays in base cabinets provide easy access to heavy tools without digging.
- Mix metal cabinets for durability with plastic bins for lightweight parts to avoid wall-mounted racks.
- Wall-mounted upper cabinets store seasonal gear, freeing lower cabinets for daily-use tools.
Adding Pegboards and Slatwalls for Flexible Organization
For a garage makeover, adding pegboards or slatwalls transforms vertical space into a dynamic organization system without wall clutter. Install a slatwall panel to hold heavy tools via hooks and bins; mount a pegboard for lighter items like wrenches. Both systems allow instant reconfiguration as your needs change. Modular accessories eliminate wasted space by keeping surfaces clear. How do I choose between pegboards and slatwalls? Pegboards suit lighter, frequently used tools, while slatwalls handle heavier loads like garden gear—both prevent chaotic piles while maintaining a sleek, customizable layout.
Upgrading Lighting and Climate Control for Comfort
Transforming a dark, drafty garage begins with upgrading lighting and climate control for comfort. Swap flickering single bulbs for layered LED panels or track lighting to eliminate shadows during projects. For temperature, a ductless mini-split system provides year-round airflow without ductwork, while installing insulated garage doors and sealing gaps keeps the climate stable. Add a ceiling fan to circulate warm or cool air, making the space usable in any season. These changes shift the garage from a storage zone to a comfortable workshop, letting you work late or relax without battling the elements.
Selecting Bright LED Fixtures That Eliminate Shadows
When upgrading your garage, selecting bright LED fixtures to eliminate shadows requires choosing high-lumen, even-distribution panels over single-bulb shop lights. Opt for fixtures with a 5000K color temperature and a high CRI (>90) to mimic natural daylight, which reduces harsh shadows. Position fixtures in a grid pattern, spacing them four to six feet apart based on ceiling height. For targeted shadow elimination, follow this sequence:
- Assess workbench and vehicle areas for shadow-prone zones.
- Select linkable ultra-bright LED strip fixtures with a wide beam angle (120° minimum).
- Mount fixtures parallel to the garage door tracks, avoiding placement directly above obstructions.
- Install supplemental under-cabinet LED strips for task-specific shadow reduction.
Adding Insulation and Ventilation for Year-Round Usability
Adding insulation to garage walls and the overhead door creates a thermal envelope, directly stabilizing interior Orga Spaces flooring services temperatures against external swings. Pair this with a balanced ventilation system—such as a solar-powered exhaust fan and passive intake vents—to expel humidity and fumes while drawing in fresh air. This dual approach prevents moisture buildup that degrades insulation and finishes, ensuring the space remains functional in both summer heat and winter cold. Year-round usability depends on sealing air leaks before installing batt or foam board insulation, then sizing ventilation to at least one air change per hour.
Strategic insulation combined with controlled ventilation transforms a garage from a seasonal shell into a consistently comfortable, usable workspace throughout the year.
Choosing a Space Heater or Mini-Split for Temperature Control
For temperature control in your garage makeover, choosing between a space heater and a mini-split depends on your goals. A portable space heater offers a quick, low-cost fix for temporary warmth during winter projects. For year-round comfort, a mini-split provides efficient heating and cooling, making your garage usable in any season. The key differentiator is consistent climate control for extended use.

- Evaluate your garage’s insulation before buying; a mini-split works best in a well-sealed space.
- Consider noise levels—space heaters can be loud, while mini-splits run quietly.
- Think about installation: plug-in space heaters are DIY-friendly, but a mini-split often needs professional setup.
- Factor in humidity; a mini-split dehumidifies air, preventing tool rust.
Common Mistakes to Avoid When Overhauling Your Garage
The most common mistake is letting the garage become a dumping ground during the makeover, so you lose valuable workable space before you even start. Failing to fully empty and sort everything first means you’ll inevitably build new shelving around old junk, defeating the entire purpose of the overhaul. Another frequent error is ignoring the concrete floor’s condition; sealing or painting over cracks and stains without proper patching leads to peeling and regret within months. Once that new epoxy coating chips, it’s a constant visual reminder of a hasty decision that cost twice as much to fix. The real trick is to measure your largest tools and vehicle before finalizing storage heights—so you don’t end up with a pristine wall system that blocks your car door from opening.
Why Skipping a Moisture Barrier Leads to Future Problems
Skipping a moisture barrier during a garage makeover is a critical error that invites costly structural decay. Concrete slabs naturally wick moisture upward; without a barrier, this trapped humidity will destroy your new flooring from beneath. Over time, the moisture causes irreparable peeling paint and adhesive failure, turning a fresh finish into a blistering mess. This hidden dampness also creates a perfect breeding ground for mold, which degrades stored items and compromises air quality. The damage follows a clear sequence:
- Moisture migrates from the concrete into the flooring material.
- Trapped vapor warps or delaminates the surface coating.
- Persistent dampness fosters mold growth and odors.
A barrier now prevents a complete redo later.
Overlooking Electrical Outlet Placement and Capacity
One critical mistake is underestimating outlet capacity for power tools. Many garage makeovers install standard 15-amp circuits, failing to account for simultaneous use of high-draw equipment like table saws and dust collectors. Place outlets every six feet along workbench walls to eliminate dangerous extension cords. Dedicate separate 20-amp circuits for stationary tools. Also, position outlets above workbench height—not behind the bench—so they remain accessible. Finally, include a 240-volt outlet for welders or EV chargers during the makeover, as retrofitting later is costly.
Question: How many outlets does a typical garage need?
For a two-car garage, install five duplex outlets minimum: two on each long wall and one near the garage door, ensuring no point is more than six feet from an outlet.
Forgetting to Plan for Vehicle Clearance and Door Operation
When overhauling your garage, forgetting to plan for vehicle clearance and door operation can turn your dream space into a daily headache. You might install storage that blocks the overhead track or add shelving that prevents the door from opening fully. To avoid this, first measure your car’s height and length while parked. Next, mark the door’s swing path and track zone. Finally, map out storage around these clearances. This oversight often leads to scratched paint or dented panels. Prioritize vehicle clearance planning early to ensure you can actually park inside. The door operation zone, including sensors and tracks, must remain obstruction-free to function safely.